-40%
1 OZ EACH MICROWORM - WALTER WORM - VINEGAR EEL CULTURES Fry Food Guppy Betta
$ 6.2
- Description
- Size Guide
Description
BUY 2 GET 1 FREE* LIMITED TIME *
SPECIAL OFFER
Simply add 2 in your
cart at
checkout and
we will send
a
3rd Combo
free
with your order
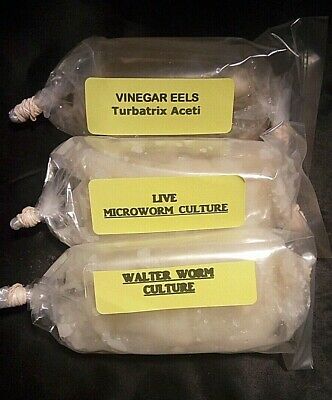
STARTER CULTURE COMBO
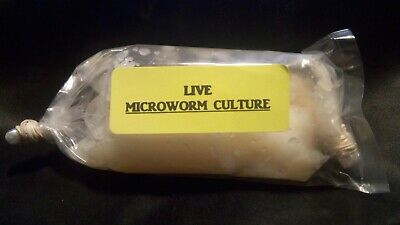
1 OZ LIVE MICROWORM CULTURE
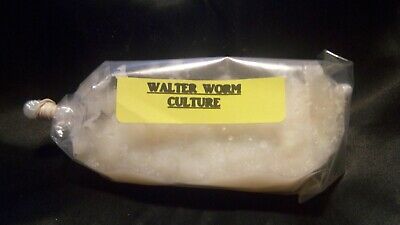
1 OZ LIVE WALTER WORM CULTURE
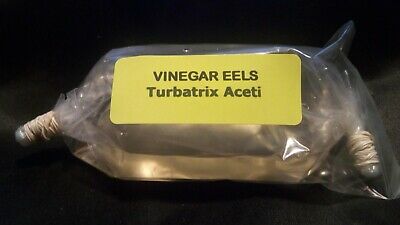
1 OZ LIVE VINEGAR EEL CULTURE
MICROWORMS
Live Microworms are a great starter food for small fry's
healthy diet.
Excellent First Food for newborn fry such as
betta, guppy,
killifish, gourami, tetra, barb, danios,
platy, corydora,
“
Microworms
” is the common name for the group of microscopic
white nematodes used as a food for small fish fry. Most smaller adult
fish will also eat the Microworms, picking at them throughout the day.
They reproduce very quickly, females birthing up to 40 babies
every one or two days for most of their life span. They
live for several weeks,
but not usually more than a month. They grow quickly to maturity (about 3 days)
and reach a maximum size .45 – 2 mm or < 0.1 inch in just six days.
T
hese nematodes
have been cultured by aquarium hobbyists since the 1930s.
Microworms will survive in the aquarium for 12 Hours & can live up to
two (2) days
giving the fry a constant food source without over feeding.
The Microworms have a
whitish color and
will move & wiggle
in the water which
triggers
the eating reflex of baby fish.
Nutritional information: (48% protein, 21% lipids, 7% glycogen,
1% organic acids, and 1% nucleic acids)
Microworms are not harmful to humans.
CULTURING INFORMATION
Culturing Microworms is very easy!
At normal household temperatures (70-75 F
or
20-28 C)
you will find the culture of microworms at it’s peak productivity.
Range: 68-85 F
MATERIAL NEEDED TO START A MICROWORM CULTURE:
1. Any Clean, Soap & Chemical free Container with a tight
fitting lid,
I
recommend using a
1 lb. or 2 lb. Deli
Style
Clear
Plastic Container with a tight Snap On Lid.
(Note: the microworms will crawl up the inside of
the container, the deeper the better. Clear, allows you to
observe the culture and how it is doing.)
Some people
use the inexpensive Glad or ZipLock containers.
Have extra containers to start more future cultures.
2. A
starch based medium. We use
Instant Mashed
Potato
Flakes
or Oatmeal.
Baby Cereal or
Corn Meal
can also be used.
3. Water that you would use for your Aquarium.
(No Chlorine or other Chemicals)
Water from the
aquarium is what I use.
4. Bakers Active Dry Yeast
5. Microworm Starter Culture
DIRECTIONS
With a sharp, thin knife or razor blade put several
small slits in the top of the container lid (for
Aeration
).
This will allow air in but not insects / fruit flies or gnats.
Or,
Use a
pin to poke holes in the lid. You can also
punch or cut a small hole in the center of the lid then cover it
with fine mesh like nylon stocking, coffee filter, paper towel,
napkin or cotton.
Use good tape or super glue to attach it.
Place about 1/2 to 3/4 inch layer of dry Potato Flakes or
Oatmeal
in the bottom of the container. Oatmeal can be
cooked but is not necessary. I've used it both ways.
The Microworms live on the top of the mixture and
a deeper Medium serves no purpose.
Moisten with water until saturated but not runny.
Use only enough water to make a paste
constancy,
Not Watery.
Sprinkle a small pinch of yeast over the top.
Add Microworm Starter Culture.
Place lid on Container.
Within 3 to 7 days the Microworms will start to
crawl up the side of the container.
COLLECTING THE MICROWORMS
Using something with a flat edge, scrape the Microworms off the
side of the container.
Be careful not to dip into the starter
culture on the bottom. I use a 2 1/2 inch 4 sided mini
wooden stick,
normally used for crafting (Purchased at Walmart in Crafts area).
You can also use a toothpick, popsicle stick, plastic knife...
Some people use a small paint brush, Q-tip or finger.
Whatever works best for you!
FEED THE FISH!
A culture can produce Microworms well for 2 weeks
&
up to 6 weeks or longer.
Start a new culture or more every 2 - 4 weeks using the method above.
It is also good to have several cultures going at the same time
just in case something happens to one. I feed multiple tanks daily so
I start several new cultures every week to ensure I always have enough.
Once a culture has quit producing, wash the container well. Rinse making
sure
there is no soap residue. Re-use the container for the next culture.
Using the method above, you can produce a
continuous supply of Microworms.
WALTER WORMS
Live Walter Worms are a great starter food for small fry's
healthy diet.
Excellent First Food for newborn fry such as
betta, guppy,
killifish, gourami, tetra, barb, danios,
platy, corydora,
“
Walter Worms
” is the common name for the group of microscopic
white nematodes used as a food for small fish fry. Most smaller adult
fish will also eat the Walter Worms, picking at them throughout the day.
Their Tiny size makes them more appropriate for very small
fry that are not able to eat
baby brine shrimp or Microworms. Walter Worms
stay in the water column longer then microworms, which tend to sink.
This makes Walter Worms best for middle of the tank feeding fry but
can be consumed by all small fry.
Baby brine shrimp are often too large for
some newly hatched fish
fry to eat in the first couple weeks of life.
Walter Worms are around half the size of microworms.
Walter Worms are relatively new to the Aquarium Hobby. They were
first cultured by
Helmut Walter in 2002. German literature is classifying
Walter worms
as Panagrellus Silusiodes.
They grow quickly to maturity
and reach a maximum size of 0.04 inch in just six days.
On average Adults are >1/16 of an inch or less.
They live for about 35 days
and a female
Walter Worms can have 60 young a day starting at around
4 days old.
Walter Worms
can live at room temperatures, and optimum
reproduction rate is at about 68-85F degrees.
Walter Worms will survive in the aquarium for 12 Hours & can live up to
two (2) days
giving the fry a constant food source without over feeding.
The Walter Worms have a
whitish color and
will move & wiggle
in the water which
triggers
the eating reflex of baby fish.
Nutritional information: (48% protein, 21% lipids, 7% glycogen,
1% organic acids, and 1% nucleic acids)
Walter Worms are not harmful to humans.
CULTURING INFORMATION
SAME METHOD AS FOR MICROWORMS
VINEGAR EELS
Live
Vinegar Eels are a great starter food for small fry's
healthy diet.
Excellent food for newborn fry such as
betta, guppy,
killifish, gourami, tetra, barb, danios,
platy, corydora...
“
Vinegar Eel
” is the common name for this group of microscopic,
non-parasitic,
small Aquatic Nematodes
(Turbatrix Aceti)
used as a food
for
small fish fry.
This means
that the Vinegar Eels can live in a water
environment like
an
Aquarium
for some time.
Most smaller
adult
fish will also eat the
Vinegar Eels
, picking at them throughout
the day.
Unlike baby brine
shrimp,
vinegar Eels will last much
longer
in your
tank
until your fry
or
adult fish eat them.
Vinegar
eels
can
live in
an aquarium for days on end and they swim throughout
the
water column.
This means less
chance of these live food
fouling the water.
To
reproduce
they need to
live in apple cider
vinegar.
The female Vinegar Eel
gives
birth up to 45 young
every
8-10 days, and
live for an average of
10 months. The adults reach
a size of a
bout 1/16 inch or 1 - 2 mm in length, young are much smaller.
Vinegar Eels need air exchange to survive and
they live and eat off of
fermenting apple in the vinegar culture.
Their tiny size makes them appropriate for small
fry that are
not able to eat
larger food.
The Vinegar Eel will go through six stages of development:
egg, four larval stages, and adult. This cycle
will occur completely
in the vinegar medium; it takes five weeks to
reach
the
adult stage. The total life span is about 10 months.
A healthy
culture can reproduce at 20X it's population in just 8 days.
Vinegar Eels
are not harmful to humans.
CULTURING INFORMATION
Culturing
Vinegar Eels
is very easy!
Vinegar Eels do well at
temperatures from 60-90 degrees.
Room
temperatures
of 68-85
degrees
are ideal for optimum reproduction rates.
MATERIAL NEEDED TO START A VINEGAR EEL CULTURE:
1. A Clean, Soap & Chemical free, clear, long neck bottle.
(Wine bottles are a good choice, any clear bottle with a neck)
2. Raw Unfiltered Apple Cider Vinegar
(With the 'Mother' is best, We use Braggs)
3. 1 Apple, washed well
4. Coffee Filter or Paper Towel & Rubber Band
5. Vinegar Eel Starter Culture
DIRECTIONS
Fill a long neck bottle 3/4 of the way to the top with a 50/50 solution of raw,
unfiltered apple cider vinegar and spring or bottled water. Add a few pieces
of sliced apple and pour in your vinegar eel culture. Top off the bottle to just
at the bottom of the neck. The neck of the bottle should have air in it.
Cover the top loosely with a coffee filter or paper towel securing it with
a rubber band.
This will allow air exchange for the vinegar Eels
.
Set in an out of the way place at room temperature.
A new culture will take
anywhere from 7-14 days for harvesting and can take up to a month, depending
temperature, size of the starter culture or size of the container.
You
will know when your
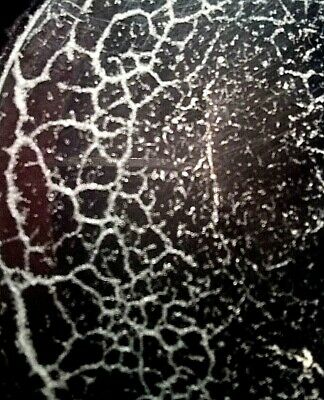
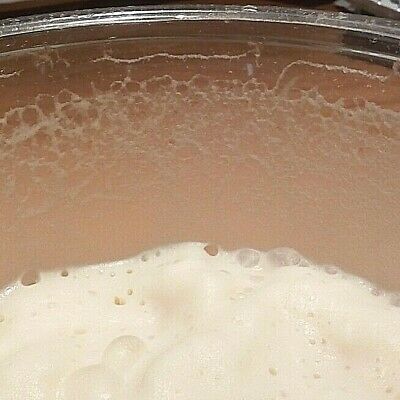
Vinegar Eel culture is doing well, you will see them
gathered around the
top edge of the Vinegar mixture in the bottle. They
are very
tiny and hard to see.
I use a
10X Magnifying glass used for jewelry.
COLLECTING THE VINEGAR EELS
MATERIALS NEEDED
Cotton Ball
Fishing Line or Strong String
Fresh Water
Eye Dropper or Pipette
There may be some slight evaporation of the solution, so you might need to
add water to the mix once in a while. If your culture was not originally
at
the bottom of the neck,
pour a 50/50 solution of vinegar and water into the
bottle until it reaches the
bottom of the neck. Don't fill the neck, you want to
have
it just at the
bottom of the neck.
Place a cotton ball with Fishing line or
strong string
attached down into the lower 1/3 into the neck of the bottle.
This will make getting
the cotton
out of the bottle much easier. The bottom
of the cotton should just
touch
the culture. Leave space between the cotton
and the top of the bottle.
Gently fill the neck of the bottle with water. The water
will stay on the top,
the vinegar will stay below the cotton. Vinegar Eels need
air. Leave the bottle
set for a couple hours. They will crawl through
the
cotton,
into the fresh water
and
in the top of the bottle neck to get oxygen. Using an eye
dropper or Pipette, siphon
the
fresh water,
full of
vinegar eels out of the top
portion of the neck of the bottle.
FEED THE FISH!
To collect more Vinegar Eels, simply add more fresh water to the bottle neck.
Or: Remove the cotton and siphon just enough liquid out to return the
level to the bottom of the neck.
A culture can produce Vinegar Eels well for 6 Months
&
up to a year or longer.
Every few months or 6... add a few slices of apple. Make sure to
keep the
culture topped of with water once in a while. When doing
this,
adding vinegar
is not
necessary, only the water will evaporate.
Start a second culture or more using the method above.
It is good to have several cultures going at the same time
just in case something happens to one.
Using the method above, you can produce a
continuous supply of Vinegar Eels
SHIPPING
PLEASE MAKE SURE THE
SHIPPING
ADDRESS REGISTERED WITH EBAY IS CORRECT.
Orders are shipped USPS First Class Mail
TRACKING WILL BE PROVIDED
Please watch for your package and
be
available to receive
it.
Please don't allow
your
LIVE
delivery to sit in a mail box or outside.
100% ALIVE & HEALTHY ARRIVAL GUARANTEE
In the unlikely event that there is
a problem with your
order,
we will
refund the cost of that
portion
of the order OR replace them
.
NOTE
:
COLORS IN PHOTOS MAY VARY SLIGHTLY
DUE TO CAMERA, LIGHTING OR MONITOR
See more
in my
other items
GREAT GIFT IDEA!
TRACKING INFORMATION WILL BE PROVIDED.
ALL CULTURES ARE PACKED WELL
.
PLEASE LOOK AT THE PHOTO AND LISTING
DESCRIPTION BEFORE BUYING.
PLEASE FEEL FREE TO CONTACT ME THROUGH EBAY E-MAIL
THANK YOU FOR LOOKING!
